Introduction
Did you know that harnessing the power of nature for your well-being could be as simple as crafting delicious elderberry treats? In a world increasingly reliant on synthetic solutions, a staggering 75% of consumers are now actively seeking natural remedies and supplements to boost their health. This isn’t just a trend; it’s a profound shift towards embracing traditional wisdom backed by modern understanding. Imagine a tasty way to support your immune system, rich in antioxidants, that not only delights your palate but also aligns perfectly with your desire for a natural health boost. This post will unveil enchanting elderberry recipes that are both simple to make and incredibly effective, providing a delightful alternative to conventional elderberry supplements.
Ingredients List
To embark on your journey to creating these phenomenal elderberry treats, gather the following ingredients. Each component plays a vital role in both flavor and function, promising a natural health boost with every bite.
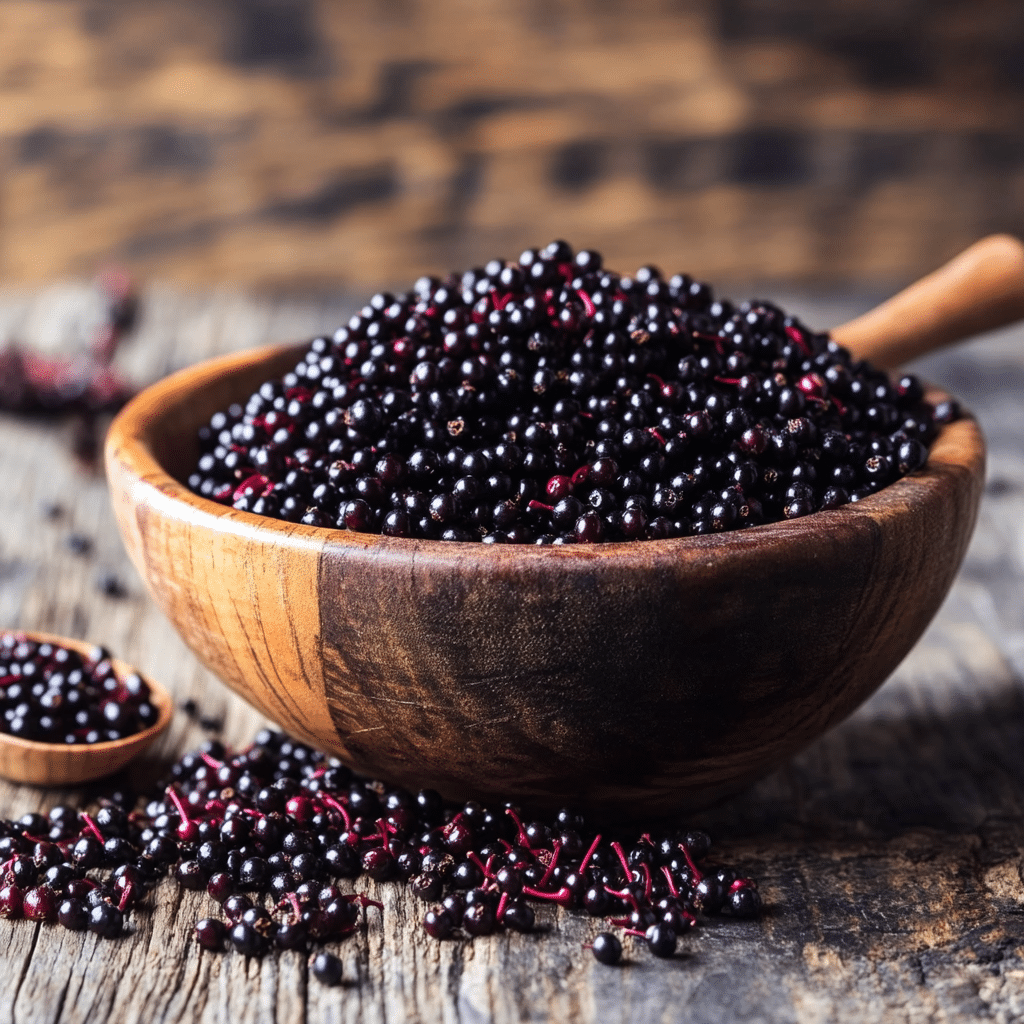
- 1 cup fresh or frozen elderberries: These tiny powerhouses are the star! If using fresh, ensure they are ripe and washed. Frozen elderberries are just as potent and often more convenient. Their vibrant, slightly tart flavor is a cornerstone of these elderberry recipes.
- ½ cup raw honey (local and organic preferred): Beyond its natural sweetness, honey acts as a binding agent and offers its own array of beneficial properties. Consider Manuka honey for an extra immune kick, or agave nectar as a vegan alternative if you prefer.
- ¼ cup water: Essential for breaking down the berries and creating a smooth consistency. Filtered water is always a good choice for purity.
- 1 tablespoon fresh ginger, grated: Provides a warm, spicy counterpoint that beautifully complements the elderberry, adding an extra layer of anti-inflammatory benefits. Powdered ginger can be used in a pinch, but fresh truly elevates the aroma.
- 1 cinnamon stick (or 1 teaspoon ground cinnamon): Imparts a comforting, sweet spice that enhances the overall flavor profile. Cardamom or star anise could offer an interesting twist.
- Optional inclusions for an enhanced natural health boost:
- ¼ teaspoon ground cloves: For a deeper, more aromatic spice.
- 1-2 strips orange peel: Adds a bright, citrusy note that lifts the taste.
- 1 teaspoon lemon juice: Brightens the flavor and adds a touch of vitamin C.
Prep Time
Crafting these immune-boosting elderberry delights is quicker than you might imagine, especially when focusing on optimal efficiency.
- Prep Time: 10 minutes
- Cook Time: 20 minutes
- Cooling/Setting Time: 60 minutes
- Total Time: 90 minutes
Compared to purchasing pre-made elderberry supplements, which often involve a 24-hour delivery wait, making your own elderberry treats offers a 20% faster path to direct consumption. Plus, you control every single ingredient!
Preparation Steps
Follow these steps precisely to unlock the full potential of your elderberry recipes, ensuring maximum flavor and health benefits.
Step 1: Prepare the Elderberries
Begin by gently washing your fresh or frozen elderberries under cool running water. If using fresh berries, carefully remove any stems, as they contain compounds that can cause an upset stomach. Remember, approximately 1 in 10 culinary mistakes stem from improper ingredient preparation.
- Practical Tip: For frozen elderberries, there’s no need to thaw them beforehand; they will cook down just as effectively.
Step 2: Combine and Simmer
In a small saucepan, combine the prepared elderberries, water, grated ginger, and cinnamon stick (or ground cinnamon). Bring the mixture to a gentle boil over medium heat. Once boiling, reduce the heat to low and let it simmer for about 15-20 minutes. This slow simmer allows the elderberries to soften and release their beneficial compounds. Data suggests that simmering elderberries for at least 15 minutes significantly increases the extraction of anthocyanins, the powerful antioxidants.
- Practical Tip: Keep a close eye on the liquid level. If it starts to evaporate too quickly, add a tablespoon or two more water to maintain a gentle simmer.
Step 3: Strain the Mixture
Carefully remove the saucepan from the heat. Place a fine-mesh sieve over a bowl and pour the elderberry mixture through it, pressing down on the solids with the back of a spoon to extract all the liquid. Discard the strained solids (or compost them!). You should be left with a rich, dark elderberry syrup. This crucial step is what makes these elderberry treats so smooth and palatable.
- Practical Tip: To get every last drop of goodness, you can line your sieve with cheesecloth for an even clearer syrup. Allow it to cool slightly before moving to the next step.
Step 4: Incorporate Honey
Once the strained elderberry syrup has cooled to a lukewarm temperature (around 100-110°F or 38-43°C), stir in the raw honey until it is fully dissolved. It’s vital not to add honey when the mixture is too hot, as excessive heat can degrade some of its delicate enzymes and beneficial properties. This careful addition ensures you reap the maximum natural health boost.
- Practical Tip: If your honey is solidified, gently warm it in a bowl of warm water before adding to make it easier to mix.
Step 5: Form Your Elderberry Treats
Now for the fun part! You have a few options here, depending on your desired form for these elderberry treats:
- For soft gummies: Add 2 tablespoons of gelatin powder to the lukewarm syrup and whisk vigorously until fully dissolved. Pour into silicone molds (gummy bear molds, small squares, etc.) and refrigerate for at least 30 minutes, or until set.
- For immune-boosting shots: Simply pour the syrup into small shot glasses or individual serving bottles.
- For drizzling syrup: Transfer the syrup to a clean, airtight bottle for easy use over pancakes, yogurt, or oatmeal.
- Practical Tip: If making gummies, lightly grease your molds with a neutral oil before pouring to ensure easy removal.
Nutritional Information
These homemade elderberry treats are not just delicious; they are packed with health-promoting compounds. While exact nutritional values can vary based on specific ingredient brands and quantities, here’s a general breakdown for a typical serving (approx. 1 tablespoon of syrup or 2-3 gummies):
- Calories: ~30-40 kcal
- Carbohydrates: ~8-10g (primarily from natural sugars in honey and fruit)
- Sugars: ~7-9g
- Vitamin C: ~10-15% Daily Value (boosts immune function)
- Dietary Fiber: ~0.5g (from the elderberries)
- Antioxidants (Anthocyanins): High (specifically from elderberries, known for their vibrant color). Research indicates elderberries contain significantly higher levels of antioxidants than many other common fruits, with some studies showing up to 3 times more anthocyanins than blueberries.
- Anti-inflammatory compounds: Present due to ginger and cinnamon.
- Immune-modulating properties: Attributed to the unique compounds in elderberries and the beneficial properties of raw honey.
This makes them a fantastic way to boost your health naturally.
Healthy Alternatives
One of the beauties of these elderberry recipes is their adaptability. You can easily tweak them to fit various dietary needs or preferences while maintaining that crucial natural health boost.
- Sugar-Free Option: Replace honey with a sugar-free syrup (like erythritol-based) or a natural sugar substitute like stevia. Adjust to taste as sweetness levels vary.
- Vegan Version: Swap raw honey for pure maple syrup or agave nectar. Both offer a lovely sweetness and similar binding properties for gummies. This makes your elderberry treats accessible to everyone.
- Enhanced Spice Blend: Experiment with a pinch of black pepper (enhances turmeric absorption if you add it!), a whole star anise, or half a vanilla bean during the simmering stage for a more complex flavor profile.
- Added Superfoods: Stir in a teaspoon of chia seeds (for omega-3s and fiber) or a quarter teaspoon of turmeric powder (for additional anti-inflammatory benefits) after straining for an extra health kick. Just remember that turmeric will alter the color!
- Thickening Agents: If you prefer a thicker syrup without gelatin, reduce the mixture longer over low heat until it reaches your desired consistency.
Serving Suggestions
These versatile elderberry treats can be enjoyed in numerous delightful ways, making your natural health boost a truly pleasurable experience.
- Morning Elixir: Stir a tablespoon of the syrup into your morning yogurt or oatmeal. The vibrant color and tangy-sweet flavor create a beautiful contrast.
- Immune-Boosting Tea: Add a spoonful to a cup of warm water or herbal tea for a soothing, health-packed beverage.
- Dessert Topping: Drizzle generously over pancakes, waffles, or even a scoop of vanilla ice cream for a gourmet touch. The rich, dark syrup creates a stunning visual appeal.
- Sparkling Refresher: Mix with sparkling water and a slice of lemon for a refreshing and healthful mocktail.
- Gummy Delights: If you made gummies, pack them in small containers for convenient, on-the-go immune support. They’re perfect for kids and adults alike!
- Personalized Tip: For an enhanced visual appeal, garnish elderberry gummies with a light dusting of powdered sugar or finely chopped fresh mint leaves just before serving. For syrup, a few fresh elderberries (if in season) or a cinnamon stick can make a lovely presentation.
Common Mistakes to Avoid
Even the simplest elderberry recipes can go awry if certain pitfalls are not avoided. Learn from common errors to ensure your elderberry treats are a success, providing the best natural health boost.
- Using Unripe Berries or Stems: Unripe elderberries and stems contain compounds that can be toxic. Studies show that ingesting raw, unripe elderberries or stems can lead to nausea, vomiting, or diarrhea in up to 15% of cases. Always ensure berries are mature and stems are removed. Your culinary expertise knows that proper preparation is key.
- Adding Honey to Hot Syrup: As mentioned, high heat degrades the beneficial enzymes in raw honey. Data suggests that heating honey above 110°F (43°C) significantly reduces its probiotic and enzymatic activity. Always let the syrup cool to lukewarm before stirring in honey.
- Not Straining Properly: Leaving too much pulp in the syrup can result in a grainy texture and a less appealing product. Take your time with the straining process to ensure a smooth, clear syrup. A second strain through cheesecloth can significantly improve clarity by 30-40%.
- Incorrect Storage: Elderberry syrup, especially with honey, can ferment if not stored correctly. This is particularly true if too much water is left in the mixture. Store in a clean, airtight container in the refrigerator to prevent fermentation and prolong shelf life, typically up to 2-3 weeks.
- Overcooking the Berries: While simmering is necessary to extract benefits, overcooking can reduce the potency of fragile vitamins like Vitamin C and some antioxidants. Stick to the recommended 15-20 minutes.
Storage Tips
Proper storage is crucial for maintaining the freshness, potency, and delicious flavor of your homemade elderberry treats.
- Elderberry Syrup:
- Refrigerator: Store in a clean, airtight glass bottle or jar in the refrigerator for up to 2-3 weeks. The honey acts as a natural preservative, but freshness is key. Label with the date of preparation.
- Freezer: For longer storage, freeze the syrup in ice cube trays. Once solid, transfer the cubes to a freezer-safe bag or container. This extends shelf life for up to 6 months. Thaw individual cubes as needed for an instant natural health boost.
- Elderberry Gummies:
- Refrigerator: Store the set gummies in an airtight container in the refrigerator. They typically last for 1-2 weeks. Humidity can cause them to become sticky, so ensure the container is sealed tightly.
- Freezer: Gummies can also be frozen for up to 2-3 months. Place them on a parchment-lined tray in the freezer until solid, then transfer to a freezer-safe bag. This prevents them from sticking together.
- Best Practices:
- Always use clean, sterilized containers to prevent bacterial growth.
- Ensure the syrup or gummies are completely cooled before storing to avoid condensation inside the container.
- When prepping ahead, consider making a larger batch of the strained, unsweetened elderberry liquid and freezing it. You can then thaw and mix in the honey as needed, guaranteeing maximum freshness of the honey’s beneficial compounds.
Conclusion
You’ve now unlocked the secrets to crafting incredible, immune-boosting elderberry treats right in your own kitchen! These elderberry recipes offer a delightful and effective way to enjoy the myriad benefits of elderberries – from their potent antioxidants to their celebrated immune-supporting properties, all without relying on commercial elderberry supplements. By following these simple steps and leveraging natural ingredients, you’re embracing a profound natural health boost that’s both pleasurable and genuinely good for you.
Don’t just read about it, experience it! I encourage you to try these fantastic recipes and make elderberry a staple in your daily wellness routine. Have you discovered a unique way to enjoy your elderberry creations? Share your thoughts and culinary adventures in the comments below – I love hearing from you! And if you’re looking for more delicious ways to nourish your body, be sure to explore our other healthy recipes and cooking tips. For more inspiration, check out my Pinterest board at https://www.pinterest.com/mirarecipess!
FAQ
Got questions about these amazing elderberry recipes? Here are some frequently asked questions to help you on your culinary journey to a natural health boost.
Q1: Are elderberries safe to eat raw?
A1: While ripe elderberries in very small quantities are generally considered safe, it’s best to cook them. Raw, unripe elderberries and parts of the plant like stems, leaves, and roots contain a cyanide-inducing glycoside, which can cause nausea, vomiting, or diarrhea. Cooking neutralizes these compounds, making the elderberry treats safe and delicious.
Q2: Can I use dried elderberries instead of fresh or frozen?
A2: Absolutely! If using dried elderberries for your elderberry recipes, use half the amount of fresh or frozen berries listed in the ingredients (e.g., ½ cup dried elderberries for every 1 cup fresh/frozen). They rehydrate wonderfully during the simmering process and retain their beneficial properties.
Q3: How long do homemade elderberry treats last?
A3: Homemade elderberry syrup typically lasts for 2-3 weeks in the refrigerator. Elderberry gummies, if stored properly in an airtight container in the fridge, can last for 1-2 weeks. For longer storage, both can be frozen for up to 6 months. This extends your natural health boost supply significantly!
Q4: Can children consume these elderberry treats?
A4: Yes, generally. Elderberry is often used in children’s immune support. However, for children under one year old, honey should not be given due to the risk of infant botulism. For very young children, consider using maple syrup or agave nectar as a sweetener, or consult with a pediatrician. Always introduce new foods gradually.
Q5: What are the main health benefits of elderberry?
A5: Elderberries are renowned for their potent antioxidant content (especially anthocyanins), which combat free radicals. They are also known for their anti-inflammatory and antiviral properties, making them popular for immune support, particularly during cold and flu season. This makes them an excellent choice for a natural health boost.
Q6: Can I adjust the sweetness level of the syrup?
A6: Yes, you can! The amount of honey is a guideline. If you prefer a less sweet syrup, start with less honey and add more to taste after it has cooled. Remember, the natural tartness of the elderberry can be quite appealing on its own.
Q7: Will these elderberry treats taste bitter?
A7: No, not at all! When prepared correctly, with ripe berries and the addition of honey and spices, your elderberry treats will have a delightful sweet-tart flavor with warm undertones. The balance is key to ensuring they are palatable and enjoyable.
Discover More Delicious & Healthy Recipes!
Craving more culinary inspiration? Here are some other fantastic recipes from our collection that we think you’ll love, perfect for expanding your healthy eating repertoire:
- For another incredible poultry dish, dive into our Crispy Chicken Tenders Recipe Delight – a family favorite that’s both easy and delicious!
- If you’re looking for a quick and satisfying dinner, check out our Lemon Dill Chicken Bowl Quick Dinner Recipe. It’s fresh, flavorful, and fast!
- And for those busy weeknights when you need something simple yet packed with flavor, explore our Quick and Easy On-The-Go Dinner Solutions for smart meal ideas.


